
At last….I’ve finally completed my ‘headboard wall’! If you have not checked out my first post diy upholstered headboard – part 1, I started this project over two months ago and it has been on my ‘to-do’ list for about seven! None the less it’s finally complete and I’m happy to say it turned out beautiful, it’s exactly what I wanted! There were a couple bumps along the way, one which included me almost firing my assistant (Dad), but he pulled through! Actually I couldn’t have done it without him. I had the vision but he was the brains behind this operation, and together we brought it to life.
Let me quickly refresh your memory…
- I fell for a pair of wall lamps and purchased them for my new bedroom, which at that point was only a figment of my imagination.
- I found a beautiful apartment and moved in!
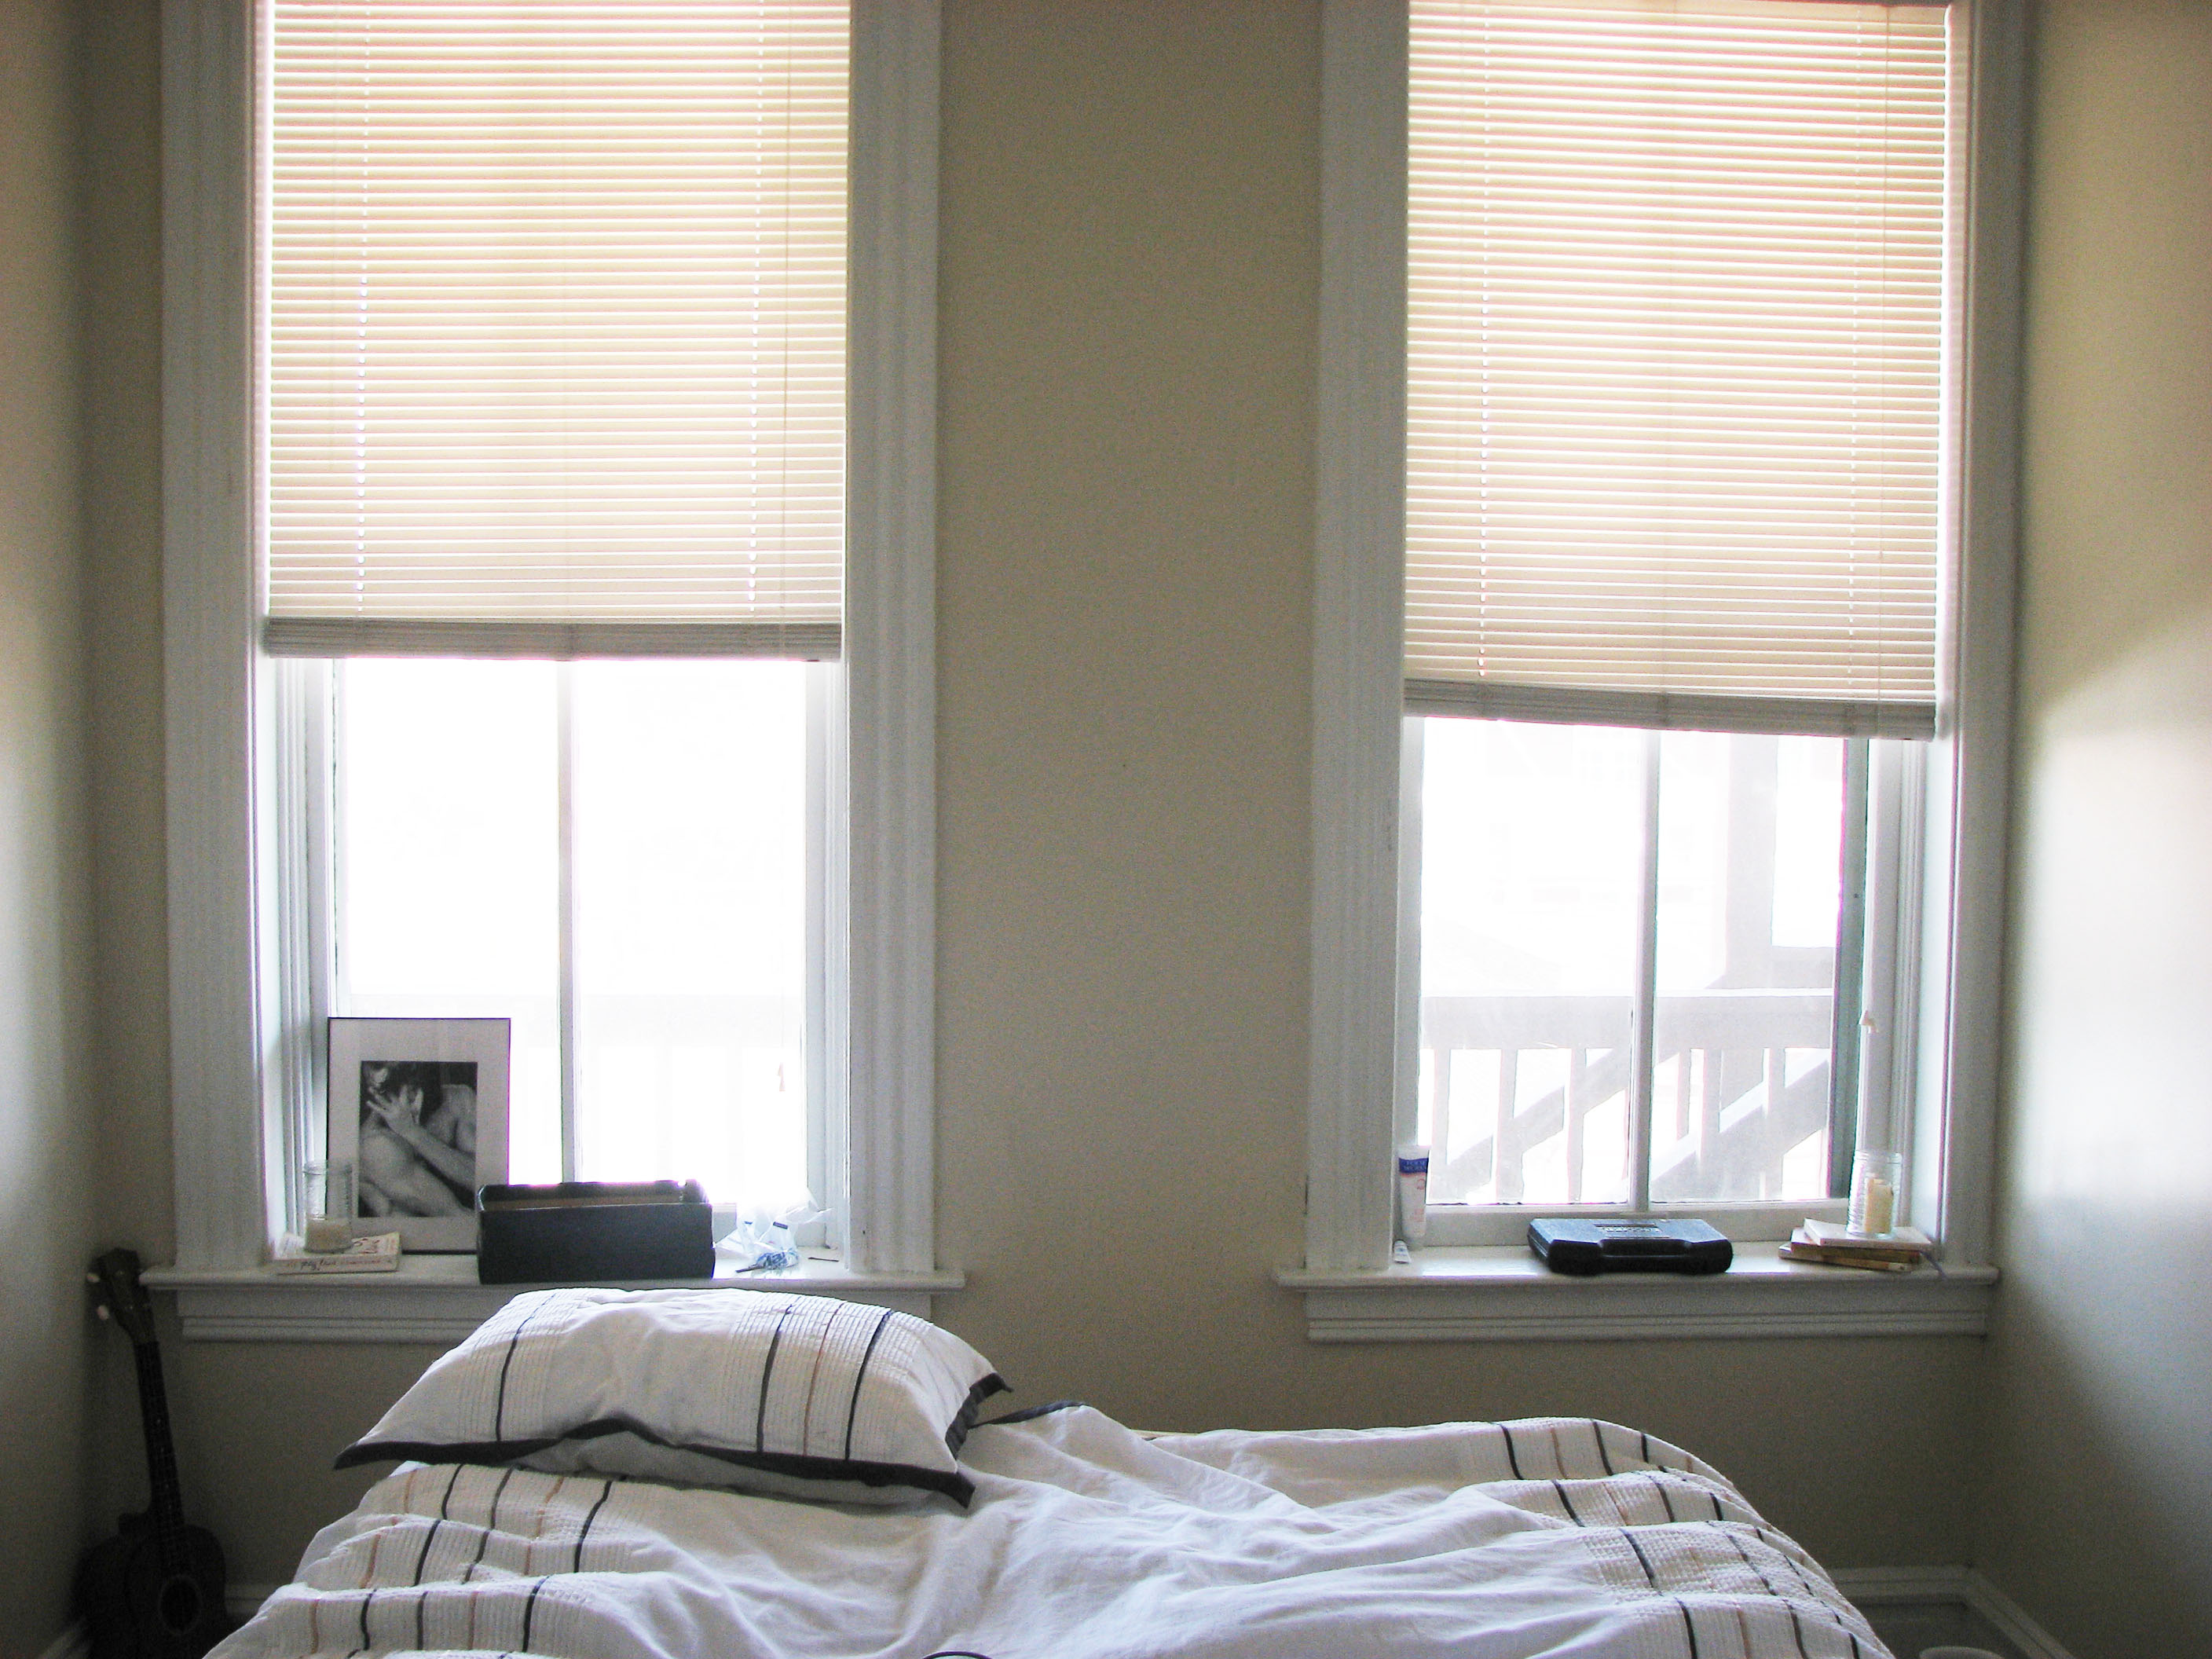
- Unfortunately, the only wall that my bed could fit on has windows located on each side, thus providing no home for my wall lights….This momentarily put a little hitch in my giddy-up, but I quickly determined that I could work with this.
Solution……

- Build a headboard with side extensions for my wall lights to attach to.
- While I’m at it, construct floating shelves to act as bedside tables.
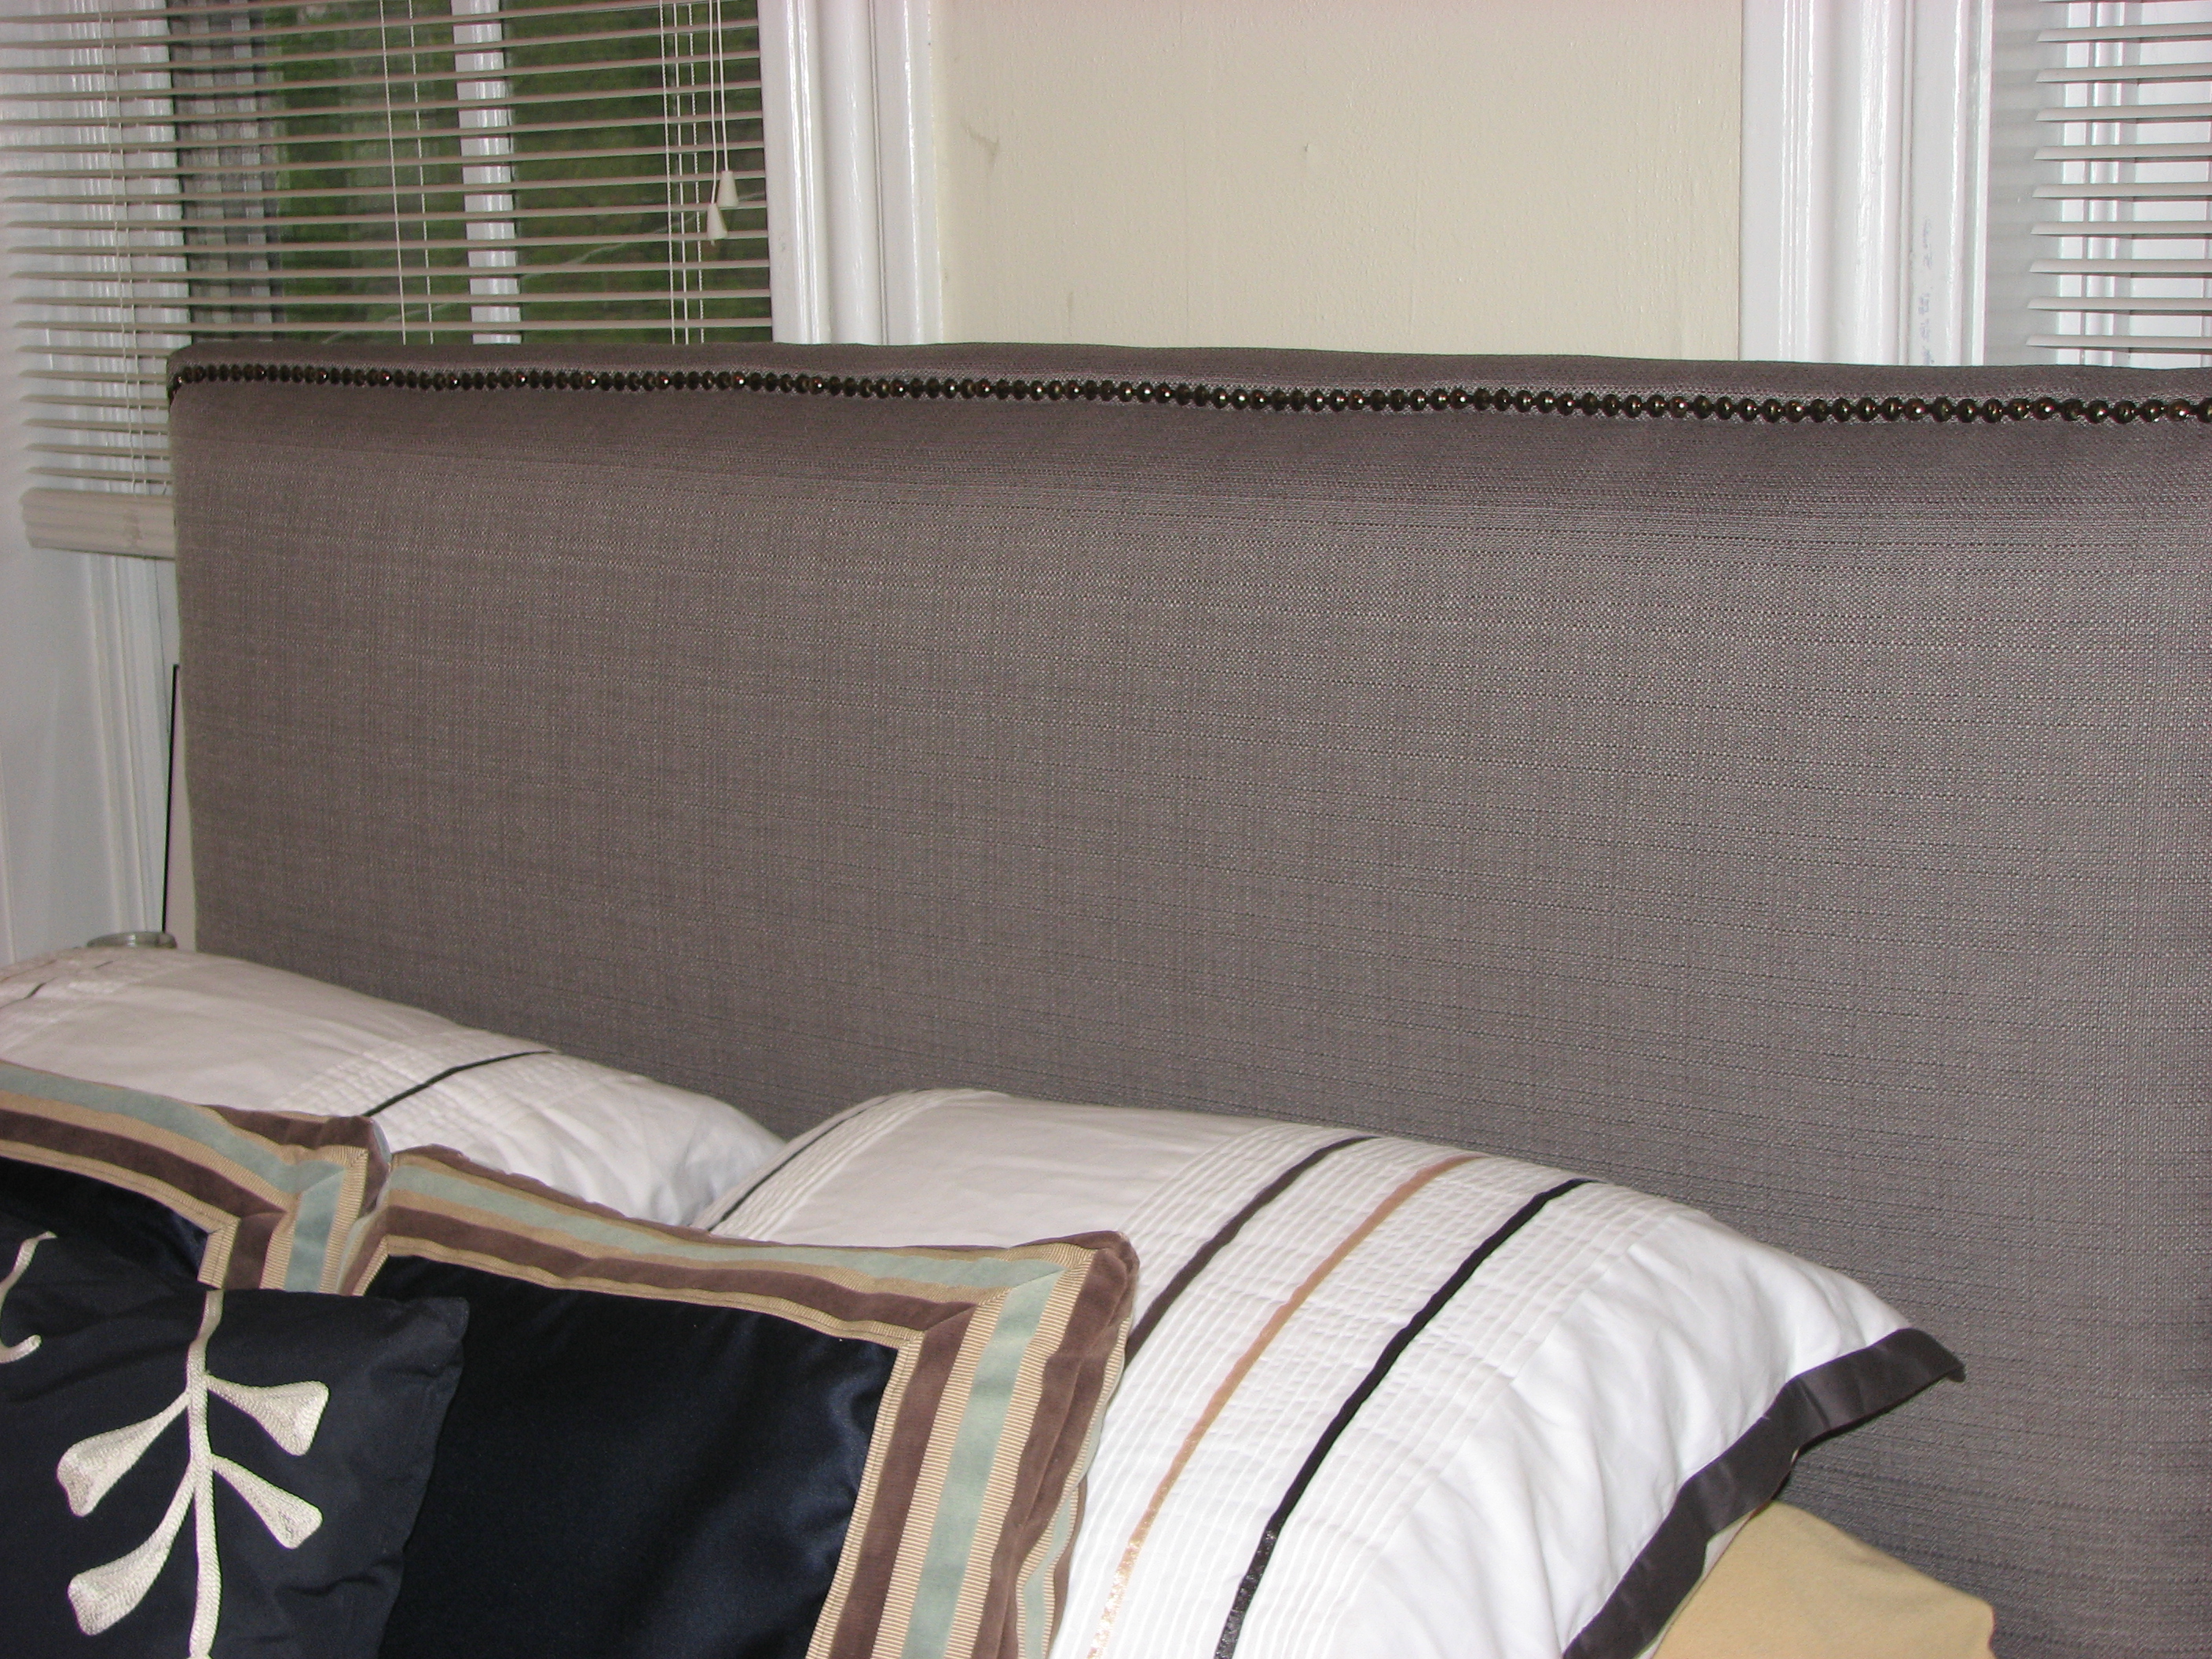
We first created the actual upholstered headboard which was part – 1.
Now for part – 2…
Step 1. We first built the two side extensions ahead of time. I decided to use planks of Western Red Cedar to construct these units. I chose Western Red Cedar because of it’s wood grain, color and it was readily available. As I mentioned in my first post, I wanted to create a slightly rustic look while keeping it refined. This is why I decided to leave the wood untreated and in it’s natural state. I also liked the way it contrasted with the upholstered headboard and added to the mix of textures!

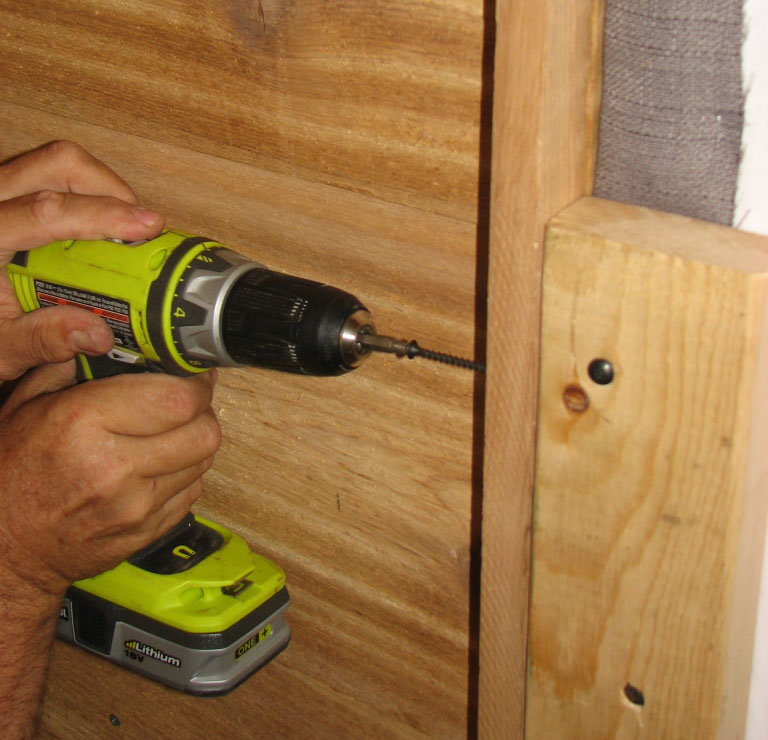
To create these pieces we used (4) 1 x 12 planks of Cedar and attached them to a 1 x 2 (on edge) sub-frame using brad nails (head-less nail). This gave us a clean flush look with the structural members behind. To design the box units we used (3) 1 x 10’s on the top and sides, and a 1 x 12 for the bottom. I originally intended on using the 1 x 10’s for the entire box, but I did not plan for enough material and we were short. So, to prevent spending more $ and having additional waste, I decided to suck it up and put the left over 1 x 12’s to use. Surprisingly, once in place I really liked the way it looked. I love when this sort of thing happens…I love it when you have to get creative due to lack of funds, or a ‘mistake’ ends up turning into something great! In some unexpected way, the deeper piece at the bottom provided this subtle detail that really added a nice touch. In fact, I wish I could say I planned it that way! We also used brad nails to create these box units and attached additional screws from the back and bottom to give it extra support and strength. While this is not engineered to be used as a step ladder, it will hold somewhere between 30 – 50 pounds.
Step 2. We attached the side extensions to the sub-frame of the headboard using (3) 1-5/8″ Phillips drive screws (cordless drill is a must)!

We built the ‘headboard wall’ in three separate/ modular units. We used removable screws so that it could be easily dis-assemble or reassemble at a later date. This also allows the different pieces to be used independently of one another, not to mention it would be extremely difficult to move as one unit.
Note: Before attaching the final section, be sure to secure a ladder behind the unit. Because this was designed to take up the entire wall space, once you’ve attached the last section, you might have a difficult time getting out from behind! We used the ladder numerous times!
Step 3.
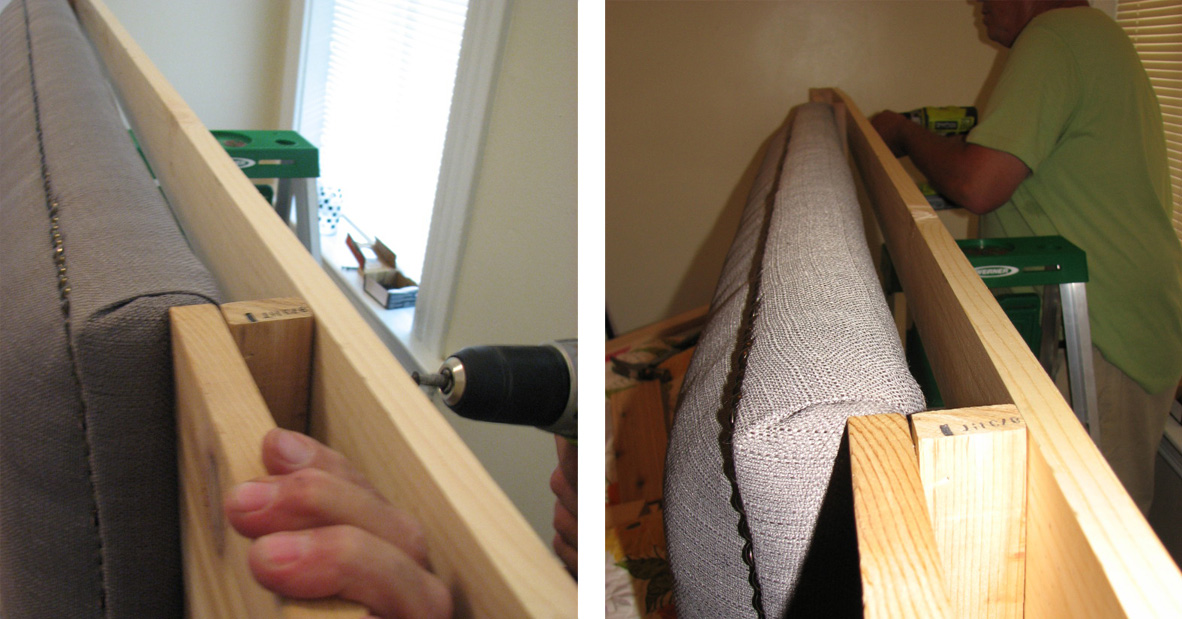
Once the last section was installed and everything was flush with the top of the headboard, we attached a 1 x 4 board (that ran the entire length) behind the unit. This was attached to the verticals of each section’s sub-frame and provided extra rigidity to the entire unit. In addition, we attached a small 1 x 4 piece of lumber behind the center of the headboard. This also attached to the 1 x 4 on the back side (see below). This was necessary for step 4 and continued to provide extra rigidity.

Step 4. The final design detail included a top piece that capped off the entire structure and visually tied it all together. Again, it also added to the overall structural support. This was screwed into 5 places…the top of each section’s sub-frame and the center 1 x 4 piece that was just added in step 3. This really gave it a nice finished look!

Below is why you need the ladder….

Step 5. Lastly, to secure the entire unit in place and ensure this bad boy wasn’t going anywhere, we used (2) 5″ – ‘L’ brackets and attached the sub-frame to the inside of each window jam, using one screw. This last step solidified the entire unit and it’s as sturdy as a tank…oh yeah!
Final Steps….

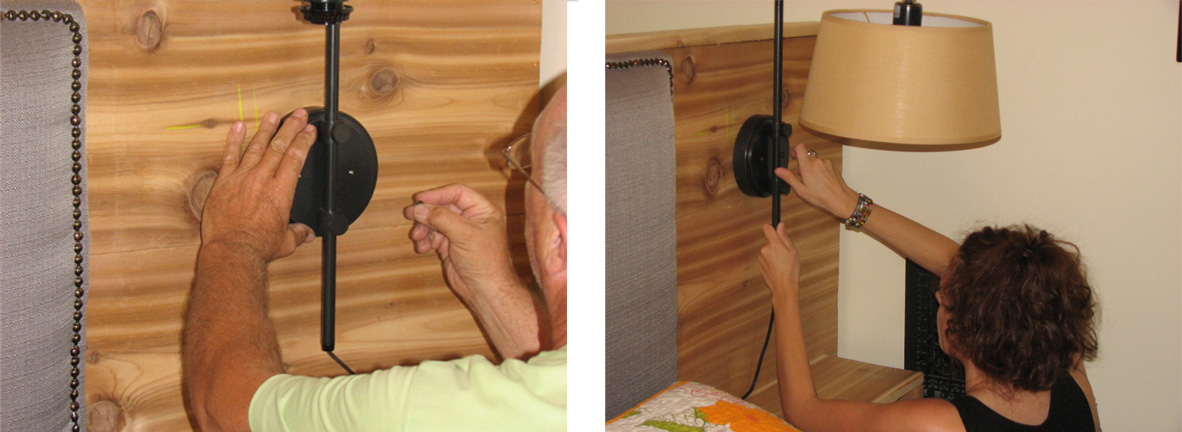
Side note…I do know how to work a power drill, but Patrick always insist on doing it himself!
Final Result!
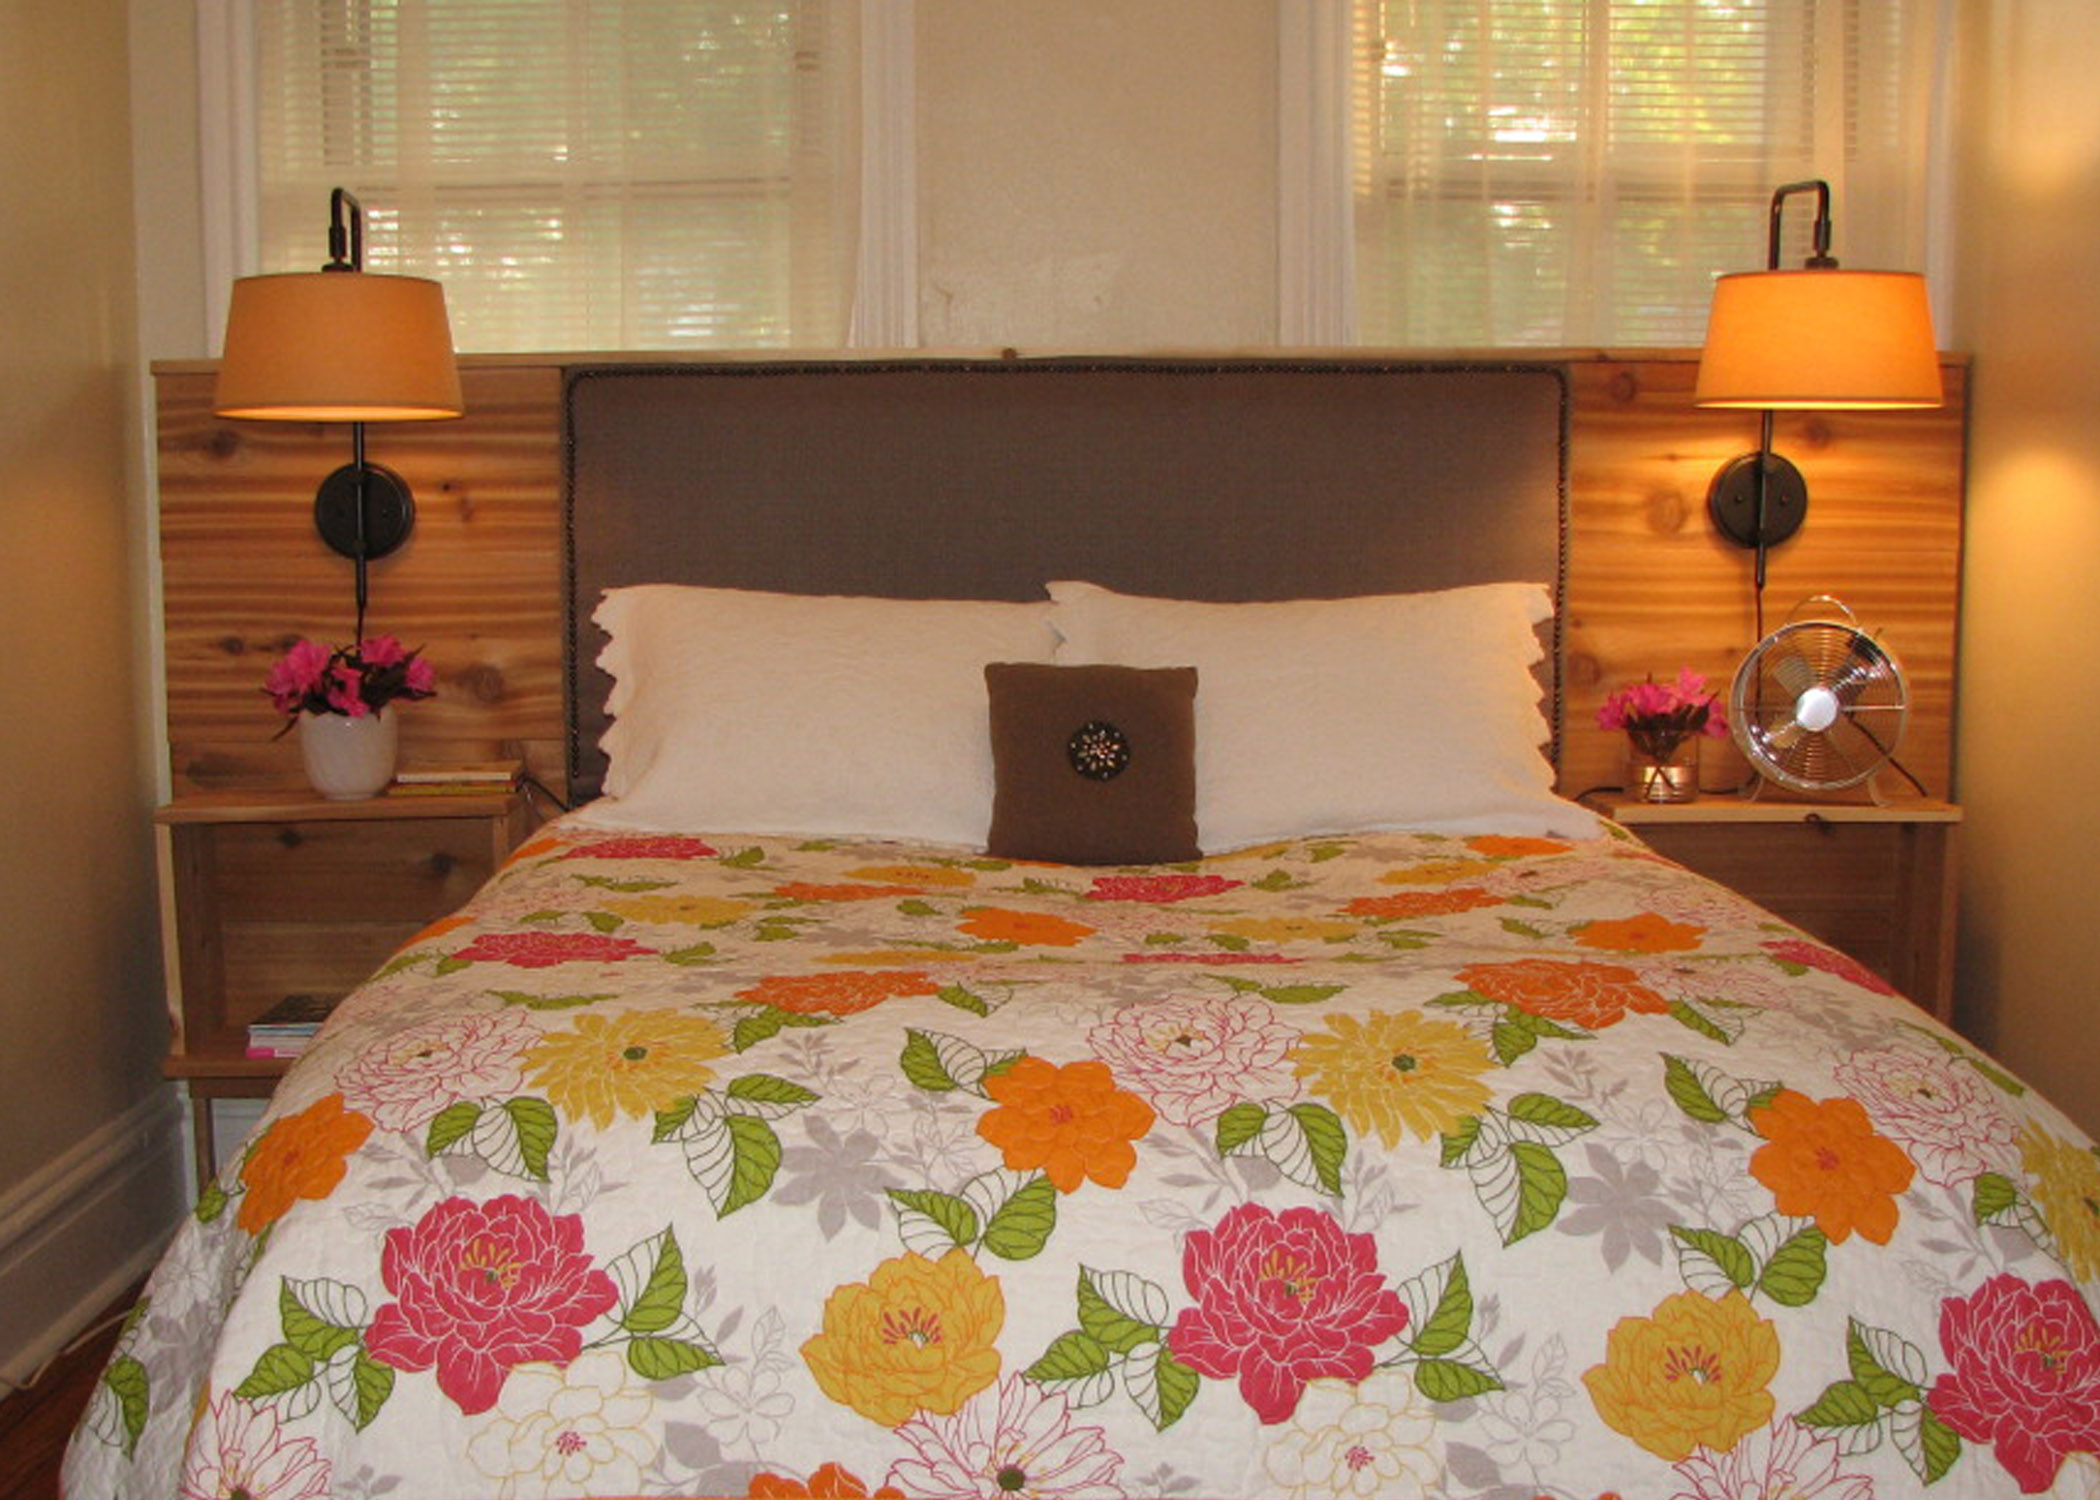


I think what surprised me most with the final result, was how much larger it made my entire room feel! That was nice and I’m not going to lie…it does add a touch of sophistication that I do enjoy!
The entire headboard definitely possesses that home-made touch and is not perfect. It is however ‘perfectly – imperfect’ which is perfect for me! As always, it’s about ‘blooming where you’re planted’…creating a space that you love, utilizing what you love and most of all, with the ones you love~
Really awesome, creative! Really helps add character to the space. Post more of your fantastic ideas please 🙂
How fantastic!
Great post! Inspiring for me to start my own DIY project!
love, love, love!!!